
A wire drawing die is not just a hard block with a hole in it. It is a precision tool with five working zones, each doing a specific job. When all five zones are designed correctly for your wire, you get accurate size, a smooth finish, and long die life. When one is wrong, the whole die suffers.
The Anatomy of a Wire Drawing Die: Bell, Entrance, Reduction, Bearing, and Back Relief Explained
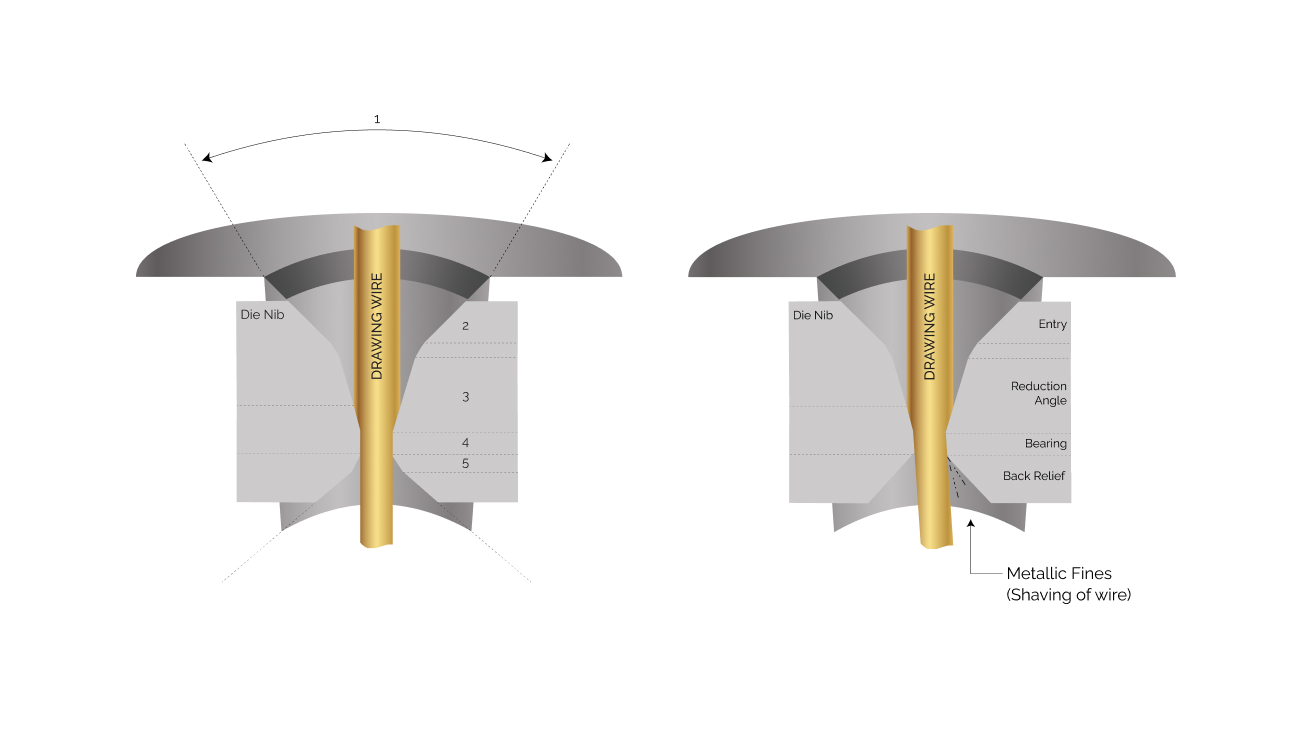
Look at a wire drawing die from the outside and it seems almost too simple to matter, a small, hard cylinder with a hole through the middle. It is easy to assume the wire just passes through and comes out thinner. But inside that hole is some of the most carefully engineered geometry in metal forming. The bore is shaped into five distinct zones, and the wire passes through each one in turn on its short, high-pressure journey from one diameter to the next.
Understanding these five zones is the single best way to understand why one die produces flawless wire for millions of metres while another, seemingly identical, struggles from the start. So let us follow the wire through the die, zone by zone.
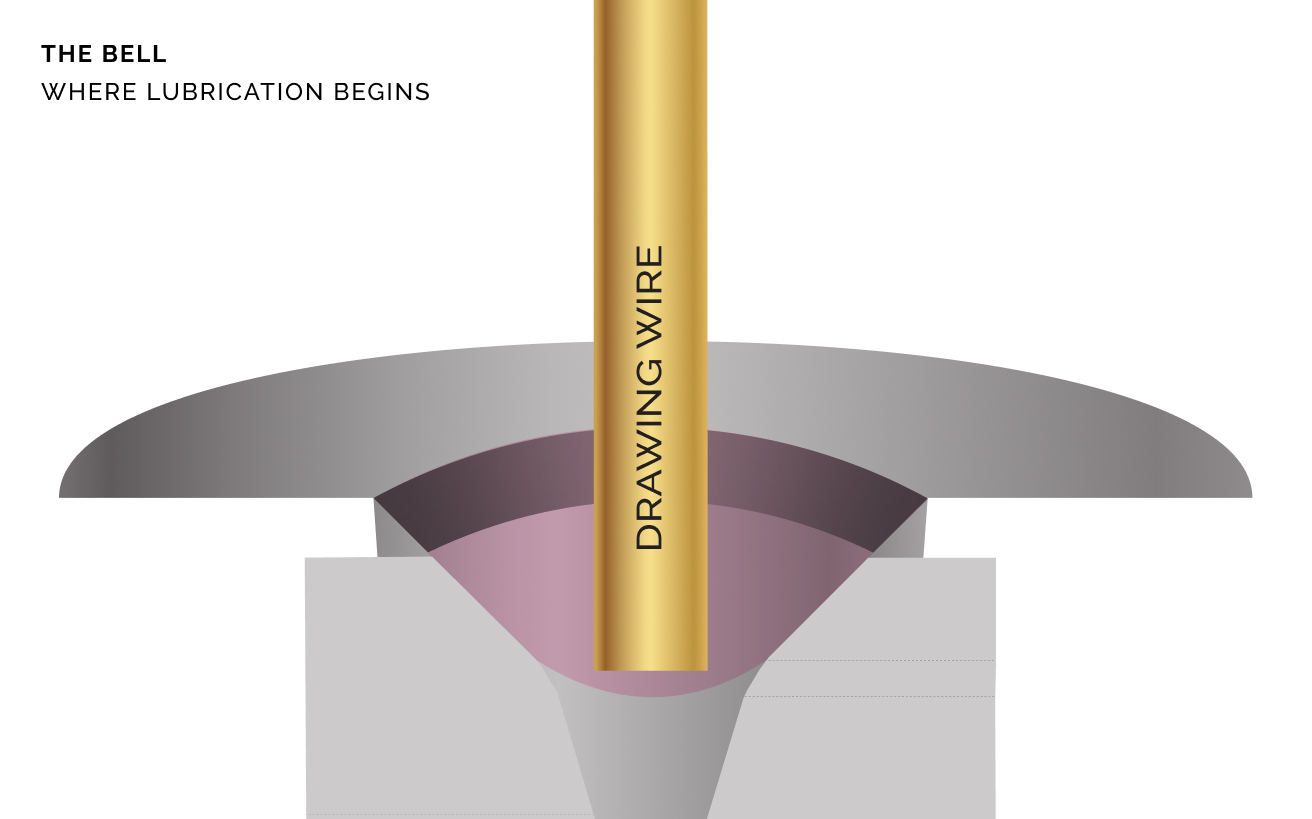
1. The Bell: where lubrication begins
The bell is the wide, flared opening at the front of the die. Its job is not to touch the wire at all, it is to manage lubricant.
As the wire rushes in, it drags lubricant along with it. The curved shape of the bell funnels that lubricant inward and builds up pressure, forcing it onto the surface of the wire before the real work begins. This thin, pressurised film of lubricant is what allows the wire to slide through the working zones instead of grinding against them.
Get the bell right and the wire enters well lubricated, friction stays low, heat is carried away, and the die surface is protected from scoring. Get it wrong and lubrication starves the zones that need it most, and wear accelerates from the very first metre. Good drawing, in other words, starts before the wire is even touched.
2. The Entrance: guiding the wire in
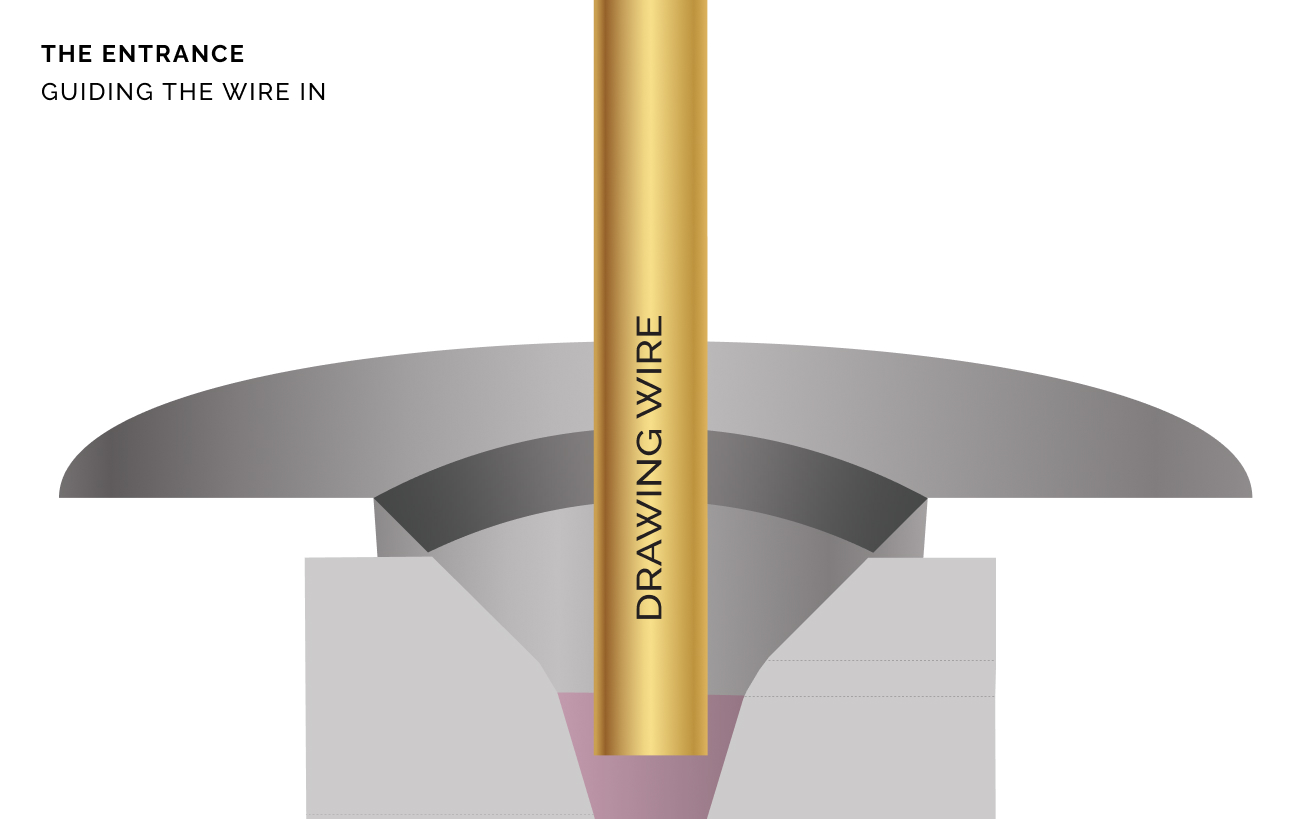
Just past the bell is the entrance, which guides the wire smoothly toward the working zone. Its role is one of transition and protection.
The entrance eases the wire toward the reduction zone so that it arrives centred and aligned, without slamming into the working surface. A clean, controlled entry means the wire makes contact with the reduction zone in the right place, which, as we will see, is critical for both wire quality and die life. Think of the entrance as the runway that lines the wire up correctly before the actual forming begins.
3. The Reduction zone: where the work happens
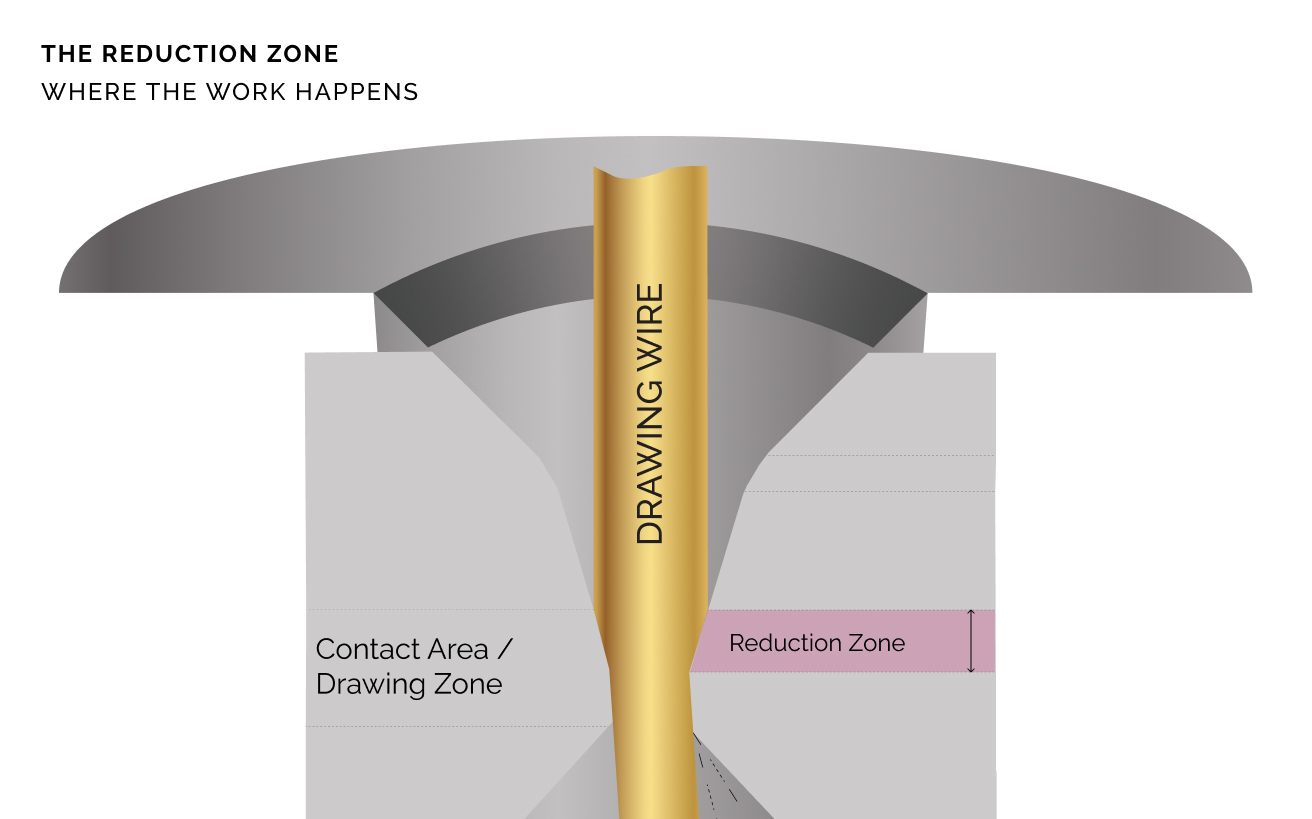
This is the heart of the die. The reduction zone is the cone-shaped section where the wire's diameter is actually reduced, where the total reduction in cross-sectional area takes place. Everything else in the die supports what happens here.
The defining feature of this zone is its angle. The reduction half-angle typically ranges from about 6 to 20 degrees, and the correct angle depends entirely on the wire:
Harder wire needs a narrower angle.
Softer wire can take a wider angle.
Greater reduction or elongation generally calls for a wider angle.
There is also a precise spot where the wire should first touch this cone, the contact point. For most wire types, that contact should happen between one-third and two-thirds of the way up the reduction angle. This is not a minor detail. When the contact point sits correctly, the metal deforms evenly and the load is spread across the working surface. When the angle is too wide for the wire's elongation, the contact point drifts too close to the bearing, and a wear ring forms there quickly, the beginning of the end for that die
So the reduction zone does not just shape the wire. Its design quietly determines how long the entire die will last.
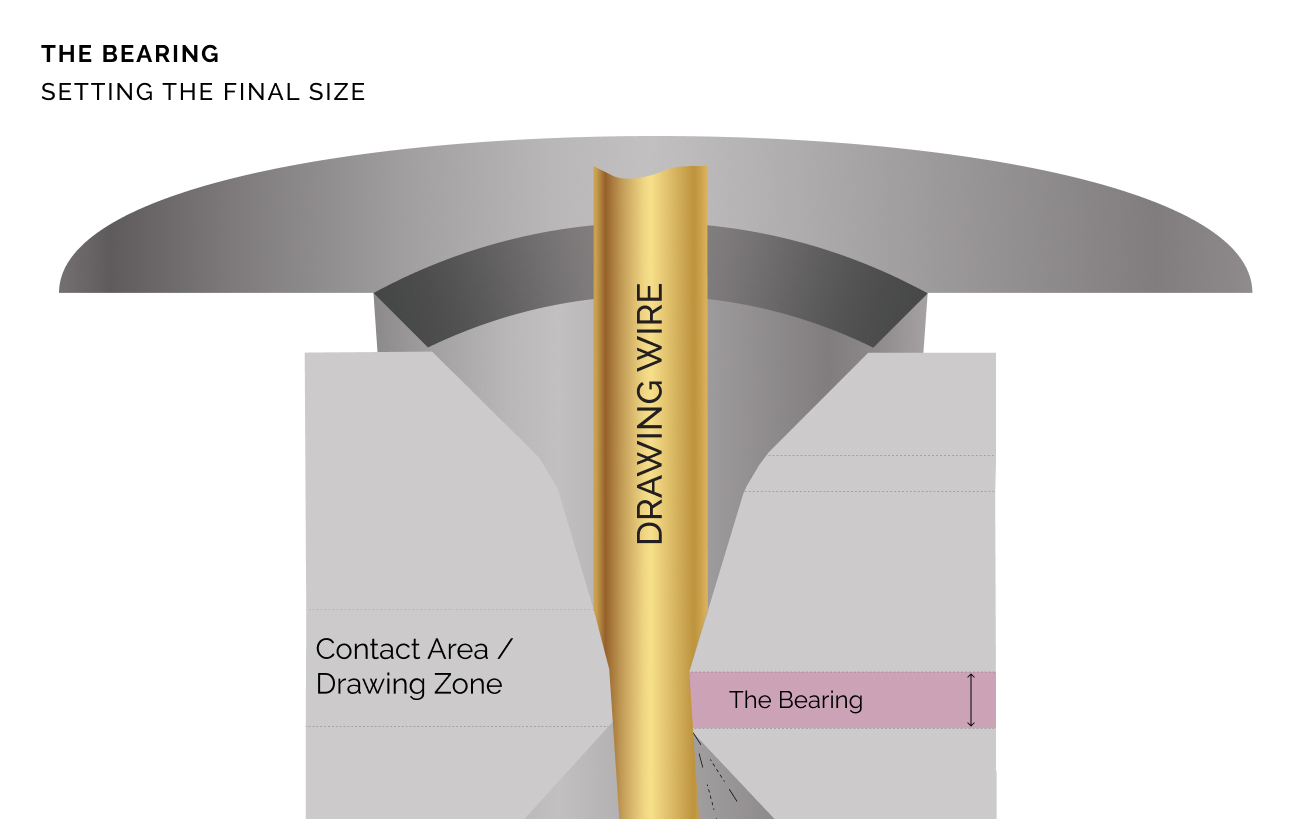
4. The Bearing: setting the final size
After the wire is reduced, it passes into the bearing, also called the land. This is the short, straight section that gives the wire its final, precise diameter.
The bearing does not reduce the wire any further. Its job is to size it and to finish its surface. As the wire passes through this straight channel, the bearing sets the exact diameter, smooths the surface, and removes minor imperfections. This is the zone that delivers the dimensional accuracy and finish your customers actually measure
The length of the bearing matters. It is usually about 20 to 50 percent of the wire's diameter, tuned to the material and the process. Too short, and the die may not hold size reliably as it wears; too long, and friction and drag rise unnecessarily. The right bearing length is a balance, set deliberately for each application.
Because the bearing is what sets your final diameter, it is also the zone that decides when a die is finished. As wear from the reduction zone eventually reaches the bearing, the bore enlarges, the wire goes oversized, and surface quality falls. The bearing is both the source of your wire's precision and the part you are protecting when you recondition a die in time.
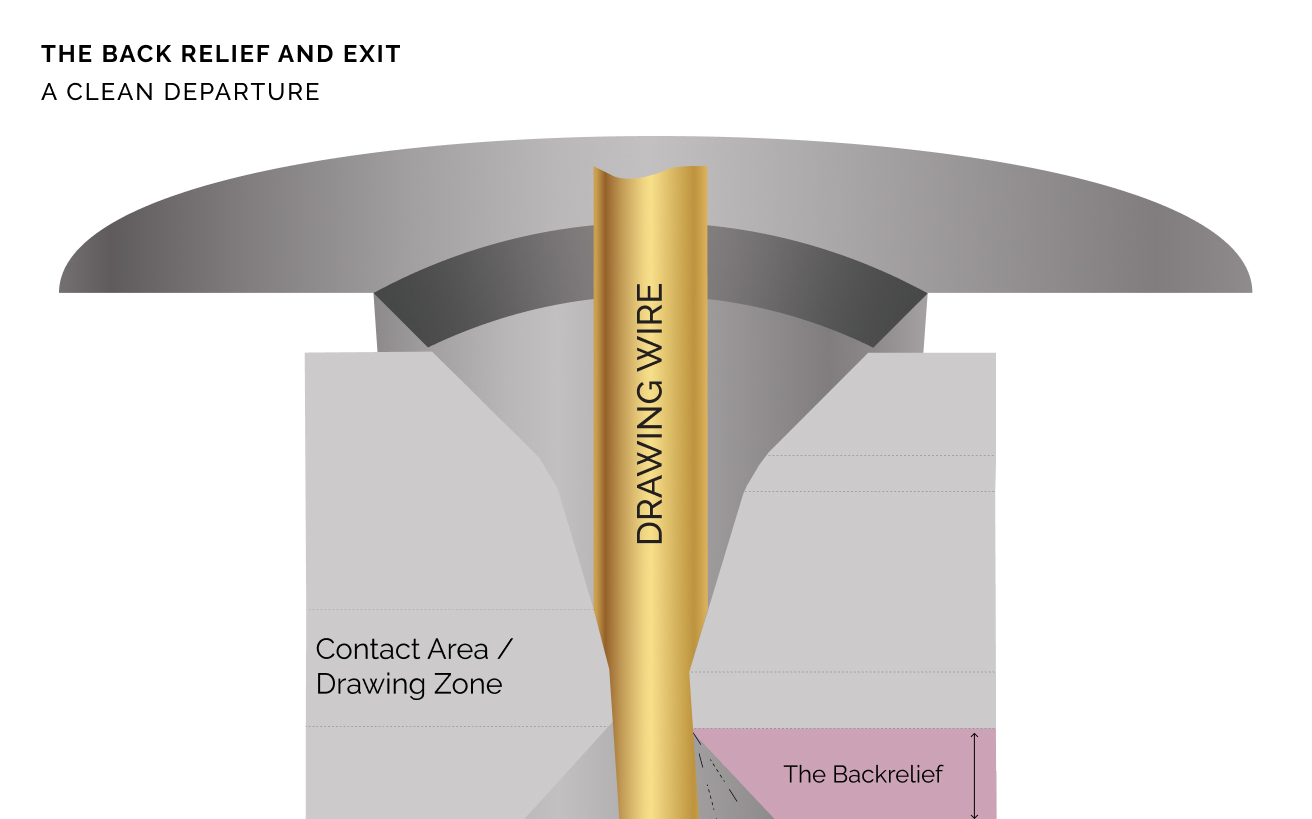
5. Back Relief and exit: a clean departure
Its job is to let the wire leave cleanly. The back relief allows the wire to exit freely and expand very slightly as it emerges. Just as importantly, it protects the wire if drawing stops suddenly or if the die is slightly out of alignment, keeping the wire away from any sharp edge that could scratch it. The exit cone that follows strengthens the die at its most vulnerable point and helps carry heat away from the working zone.
It is a quiet finish to a violent process, but a poorly formed exit can scratch or mark wire that was perfect a millimetre earlier. The last zone protects all the work done by the first four.
Why the five zones work as a system
The most important thing to understand is that no zone works alone. They form a chain, and the wire is only as good as the weakest link.
-
The Bell:
Feeds the lubricant that protects the reduction zone.
-
The Entrance:
Positions the wire so it contacts the reduction zone in the right place.
-
The Reduction Angle:
Determines how evenly the bearing will wear.
-
The Bearing:
Sets the size that the back relief then lets pass without damage.
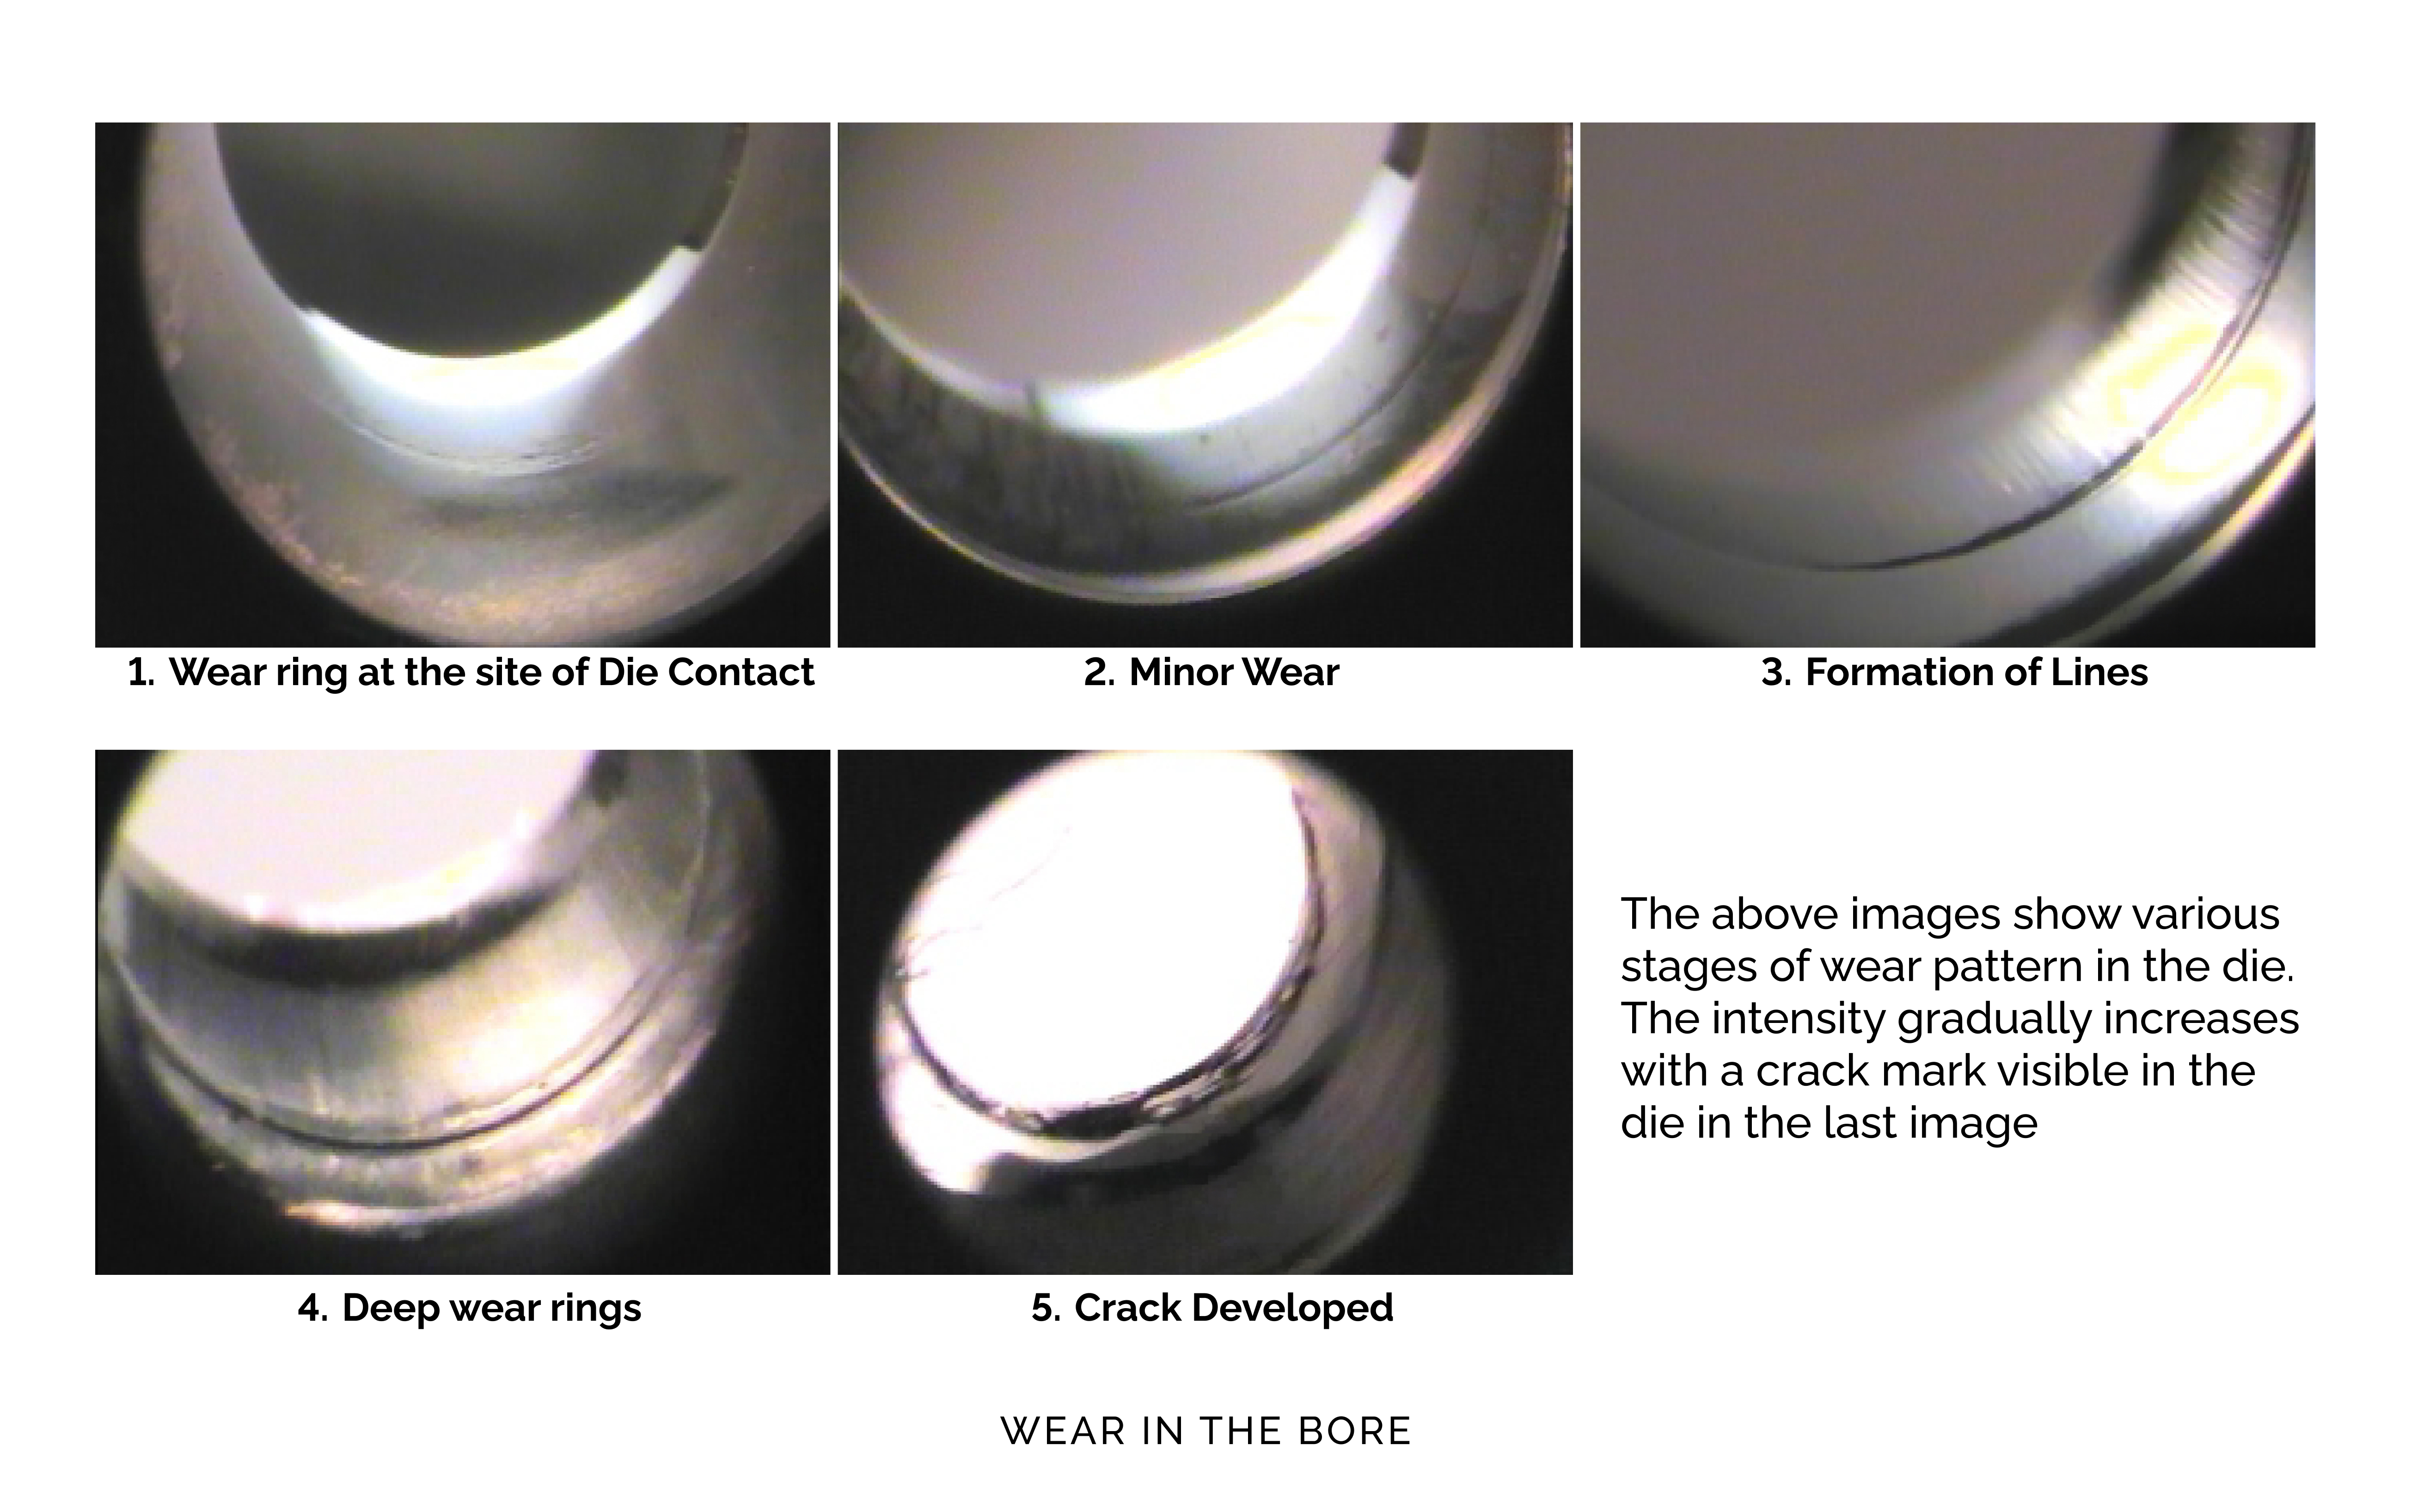
Change one zone and you affect the others. This is also why a worn die fails in such a predictable pattern. Wear almost always begins as a ring at the wire's contact point in the reduction zone. Over time that ring spreads toward the bearing. Once it reaches the bearing, the wire goes oversized and the finish deteriorates, and the die needs reconditioning or replacement. Knowing this pattern is what lets a good operator catch a die early, while it can still be repolished, rather than running it to destruction
Why generic dies disappoint
When the five zones are designed for "average" wire, they are wrong for your specific wire. Copper is not steel. Fine wire is not heavy gauge. A slow line is not a high-speed one. A reduction angle that suits one will wear quickly on another; a bearing length that holds size on one material will drag on another.
This is the real reason two dies of the same material can perform so differently. It is rarely the material. It is the geometry of the five zones, and whether that geometry was designed for the job in front of it or pulled from a generic catalogue.
The Walson Woodburn approach
We design every zone of every die around your specific application, your wire material, your reduction, your machine, and your speed, rather than from a one-size-fits-all template. That is why our dies hold their size and finish, run after run, and why they reward careful reconditioning with long, productive lives.
A die is only simple on the outside. Inside, it is five precise zones working as one. Get that geometry right and everything downstream, quality, consistency, and cost per tonne, falls into place.
Need a die engineered for your exact wire? Get in touch with our team and we will design the right geometry, zone by zone, for the job.
New Articles
The Latest we have to offer
Die Engineering
Written on 13 June 2026
Maintenance
Written on 13 July 2026